BBQ Masterclass Recap - Melbourne July 2017
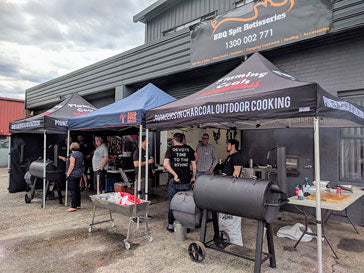
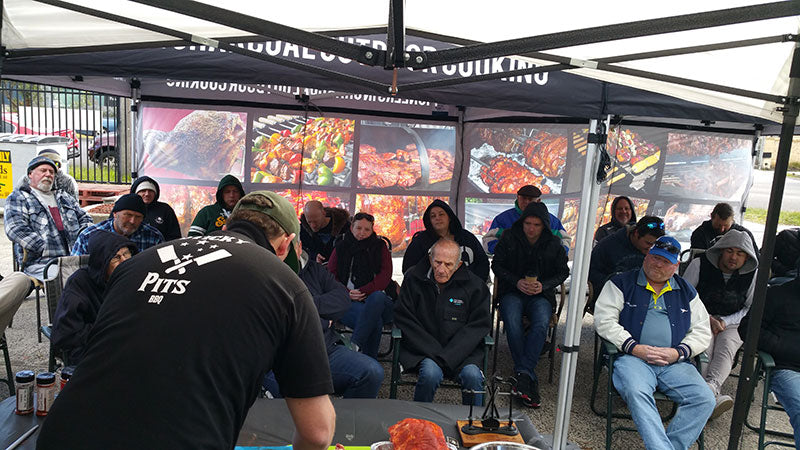
Last weekend Blake from Sticky Pits BBQ competition team showed off his barbecuing skills at our Seaford store in front of more than 20 BBQ enthusiasts.
55km winds were forecasted for Melbourne and unfortunately, on this occasion, the weather man wasn't wrong! Fortunately, we had ample bags of mallee root charcoal on hand with every pole on our marquees weighted down with 100kgs of charcoal. It was difficult to hear at times with the wind bellowing, however Blake did a great job in sharing his vast knowledge of low and slow cooking.
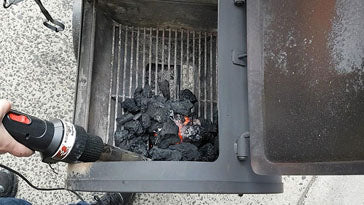
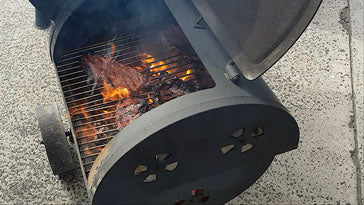
The day started off Blake demonstrating the easiest way to get the fire going in his offset smoker fire box using the Flaming Coals Charcoal Starter Wand.
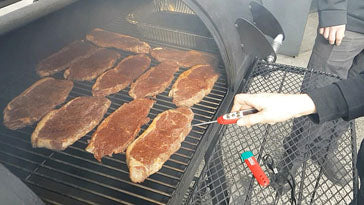
While the offset smoker was getting up to temperature, Blake sliced up half a dozen steaks to be used for the reverse sear demonstration and rubbed the outside with Meat Mitch Steer Rub. Reverse searing steaks is the process of cooking your steaks at a low temperature to get it to rare/medium-rare and then applying high heat for a minute either side to sear/crisp up the outside. While every pitmaster does it slightly different, Blake likes to get his steaks up to an internal temperature of 120ºF before searing the outside on extremely high heat in the offset smoker fire box. Naturally, a bit of steak around morning tea time went down a treat!

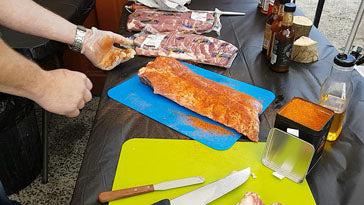
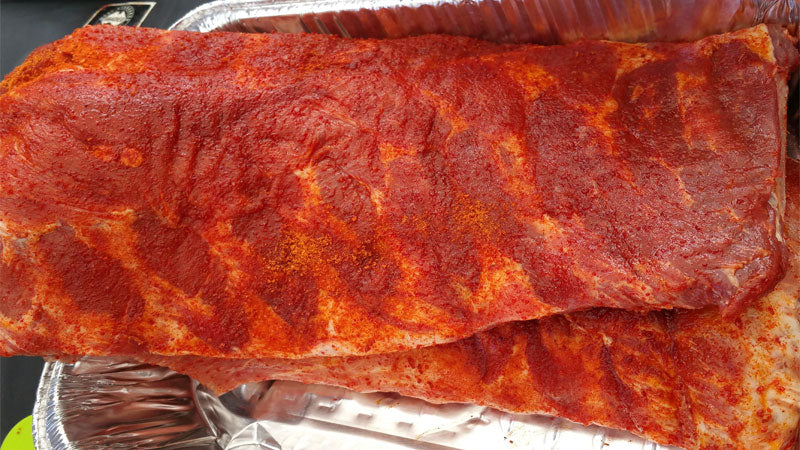
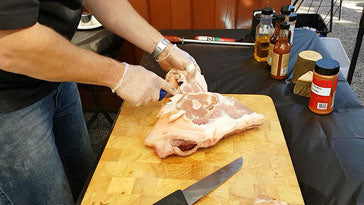
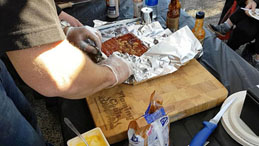
Next was the preparation of the pork ribs. Blake explained the differences between baby back ribs and spare ribs and how spare ribs are traditionally used by restaurants and on the competition circuit. The ribs were trimmed and the all important membrane was removed from the back. For those of you who couldn't attend the membrane is the silverskin on the underside of the ribs which if not removed, turns into rubber when you bite into the ribs. It is easy enough to remove. Use something blunt to get in underneath and pull up. Then use some paper towel to get a good grip and pull. It was a great opportunity to test out the new La Familiar BBQ rub by BBQ Mafia. Just look at that red colour!
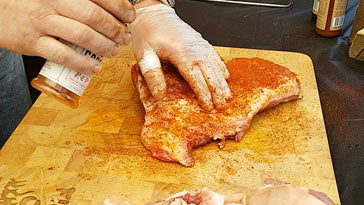
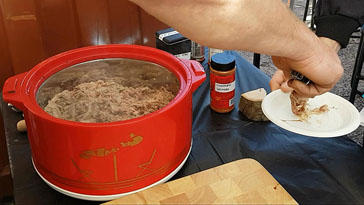
Next was the pork shoulder or the boston butt as it's commonly known. Here we used Hardcore Carnivore Red which has a beautiful sweet flavour and has an amazing red colour also. Because of how long it normally takes to cook a pork shoulder to the point where it is ready to pull, we cooked 2 shoulders the day prior for all to sample and enjoy. To cook that perfect pulled pork, we smoke the pork with mallee root charcoal and iron bark chunks at 225ºF until the internal temperature reaches 200ºF.
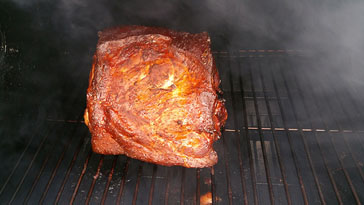
During the cooking process, you'll find that the pork willstall at around 160ºF. What this means is that the internal temperature of the pork stagnates and stops increasing. At this point, we wrap the pork in foil to help push it past the stall. Apart from regularly opening the smoker to probe it, we recommend using an EZTemp thermometer which stays inside the meat and you can check it remotely at any time. Depending on the size of the pork, the whole cooking process can take anywhere from 8-12 hours. Once the pork reaches that all important 200ºF, remove it from the smoker and allow to rest for an hour to allow the juices to settle.
After the pork has had a chance to rest, unwrap the pork from the foil and pull it. We find that the easiest way to pull the pork is with a pair of meat claws. If you don't have a pair, you can use a couple of forks. Because in this instance we weren't eating the pork straight away, we vacuum sealed the pork into large bags to be sous vide the following day.
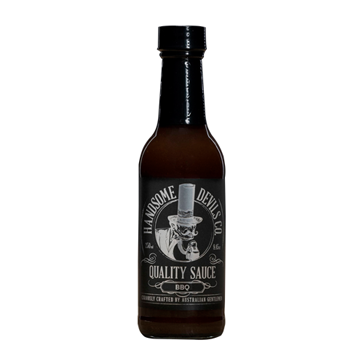
While Blake was demonstrating how to prepare a pork shoulder, the vacuum sealed bags of pre-cooked pork were being slowly brought back up to temperature. Because the bags were vacuum sealed, all of the moisture in the pork was retained and it tasted as fresh as it did when it was pulled out of the smoker the day before. This was also a great opportunity for everyone to try out our new Handsome Devils Hot Sauce.
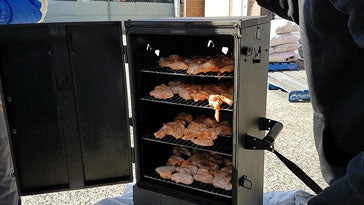
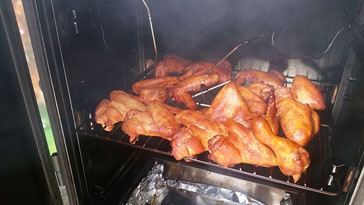
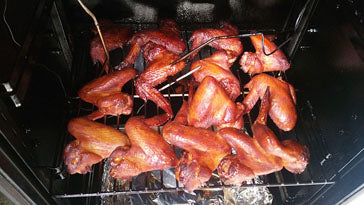
Everyone who attended the BBQ class were at various skills levels. To show people that you can still achieve great results when cooking with a gas smoker, we lit up the Flaming Coals Gas Smoker and filled it with 48 chicken wings on the 4 racks. At 300ºF, the chicken wings were ready in under 1 hour. The Kick Butt Chipotle & Honey rub was used on the chicken wings. Chicken wings are typically cooked at higher temperatures than other meats so that the skin is crispy rather than rubbery.
For those of you who are interested in learning more about different types of smokers, watch this video which explains how the different types of smokers work.
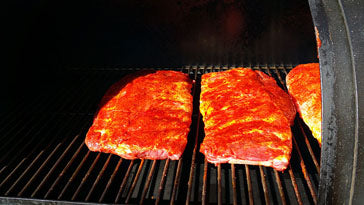
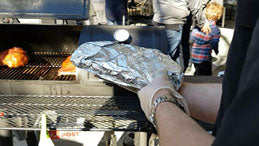
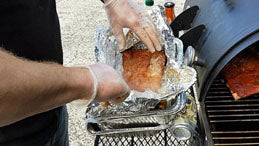
After smoking for around 3 hours, it was time to wrap the ribs. Before wrapping, butter and brown sugar were added to the top of the ribs for extra flavour. One is to expedite the cooking time, the second is to keep the moisture in the meat.
At around lunchtime, we switched gears and started the spit roasting part of the day.
My in-laws had a Greek restaurant in the famous Bridge Road Richmond for many years back in the 80s, followed by a winery on the Mornington Peninsula with a Greek restaurant attached. I worked at the winery/restaurant every weekend for 10 years and have vivid memories of spending every Friday night preparing copious amounts of lamb gyros. My in-laws had their tried and tested recipe they perfected over the years comprising of salt, pepper, onion, garlic and sweet paprika, followed by regular basting of olive oil and lemon juice.

While a lot of butchers will pre-prepare your gyros for you, I wanted to demonstrate that someone with zero butchering experience is able to prepare it in not a lot of time.
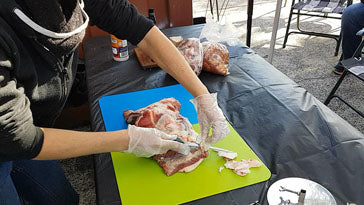
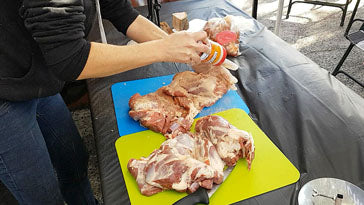
I took a whole de-boned lamb shoulder, trimmed it and cut it into the right cut for the spit. If you've left planning your spit until the last minute, it is possible to pick up a whole shoulder from the supermarket and cut it up yourself. The main thing is to make sure that it is sliced into fillets around 10mm in thickness. This is so it cooks and carves easily.
Similarly, I thin down the chicken thighs to make them more uniform in thickness.
To put the meat onto the skewer, all you do is simply squash chicken thighs and lamb shoulders onto the skewer and in between 2 gyros plates. Check the recipe I used. All up, we had around 4kgs of gyros.


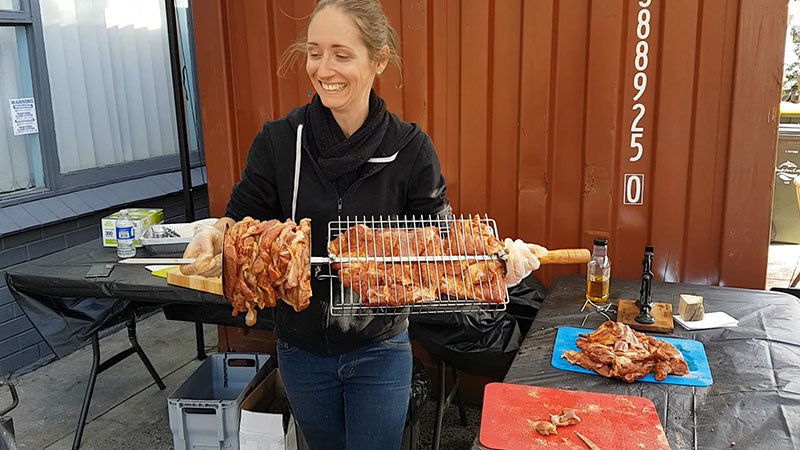
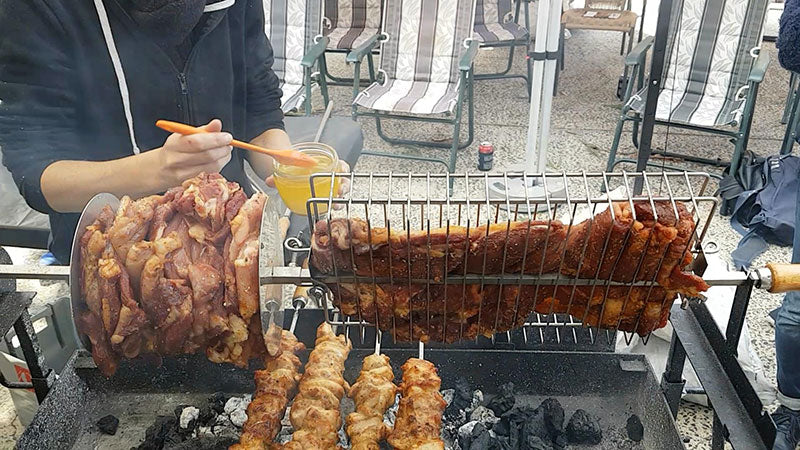
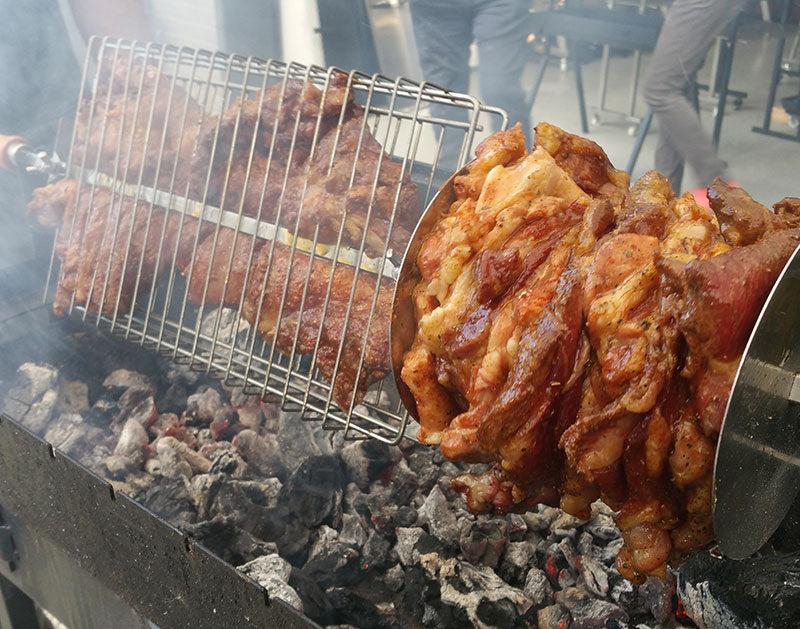
My favourite spit roaster to cook on is the Flaming Coals Cyprus Spit Roaster. It's compact and can be used to cook in a multitude of different ways. In addition to the gyros, I also put a de-boned lamb shoulder in the rotisserie basket so we had gyros on half of the skewer and the flattened out shoulder in the other. The best thing about cooking in the basket is that it's fast. Instead of cooking through a whole round roast which could be 15-20cm in diameter, the basket allows you to lay the meat flat so it's no more than 6cm thick. Cooked through to well done, this lamb was taken off in around 50 minutes.
While the gyros and lamb were cooking on the large skewer, I loaded up 3 small kebab skewers with chicken. Within 15 minutes, the chicken was done and succulent moist chicken was being enjoyed by all.

While the meat in the smoker continued to cook and the lamb and chicken continued to turn on the spit, this was everyones opportunity to ask any BBQ related question they could think of. This to me is the best thing about BBQ Masterclasses and why we love putting these events on. Where else can you go to mingle and chat to other people who live and breathe barbecuing?
Everyone who came along was at various stages of their barbecuing journey. Some were just looking at getting into it while some already had a smoker and were looking at taking their skills to the next level. It was great to see some familiar faces from customers who had previously been into the shop.
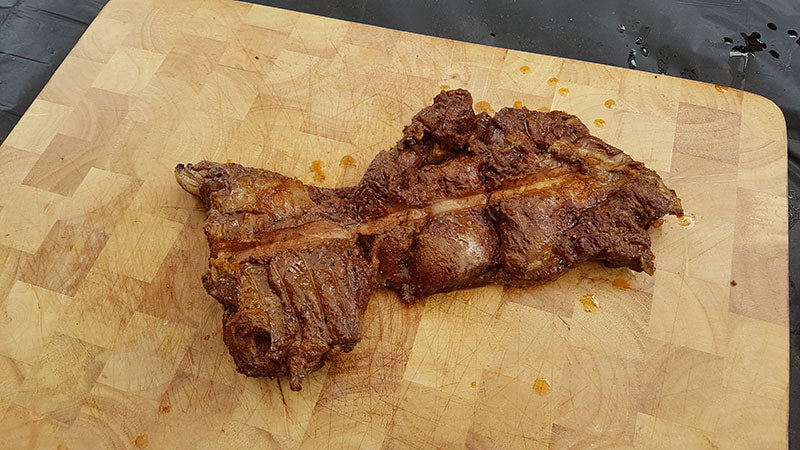
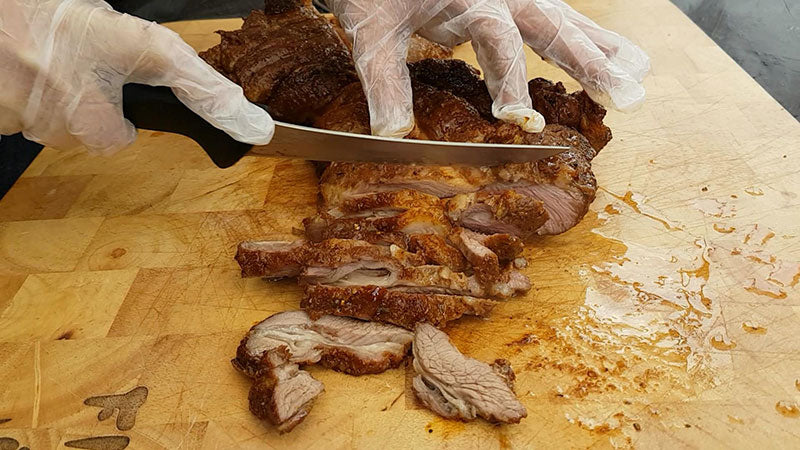
After 5 hours, the ribs were ready to be mopped, carved and served.


After 50 minutes, the lamb shoulder in the basket reached 70 degrees and was ready to be carved
After just over 1 hour, the gyros was ready for its first carve. Using an electric carving knife, I shaved the outside inch of the meat onto a gyros carving shovel. Once the meat was on the shovel, I browned it off for another 2-3 minutes to really crisp up the outside. The first carve of the gyros was enjoyed by all with further carves every 30 minutes or so thereafter.
You can also check out the recap of our previous BBQ Masterclass.


